 |
Honda VFR750 Interceptor
|
|
|
Honda VFR750 Interceptor
|
|
Transmission Shift Improvement |
|
|
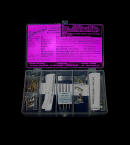
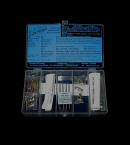
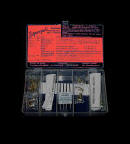
SHFT-PRO-HON-8-vfr750 $149.95 (add $20 for hybrid ceramic bearing) Microbearing Detent Arm, F-Pro Shift Spring and shift cover gasket (no star) |
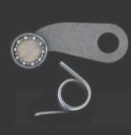
Pro Shift Kit Stage 1
Microbearing
Detent Arm, F-Pro
Shift Spring and shift cover gasket Has Factory Pro's Microbearing Detent Arm for quicker more consistent shift drum rotation - quicker rotation = quicker shifting and fewer missed shifts. Fits 90-97 models March 2, 2007 Date: Fri, 02 Mar 2007 20:40:11 -0500
Most excellent user installation
page: |
|
$149.95 |
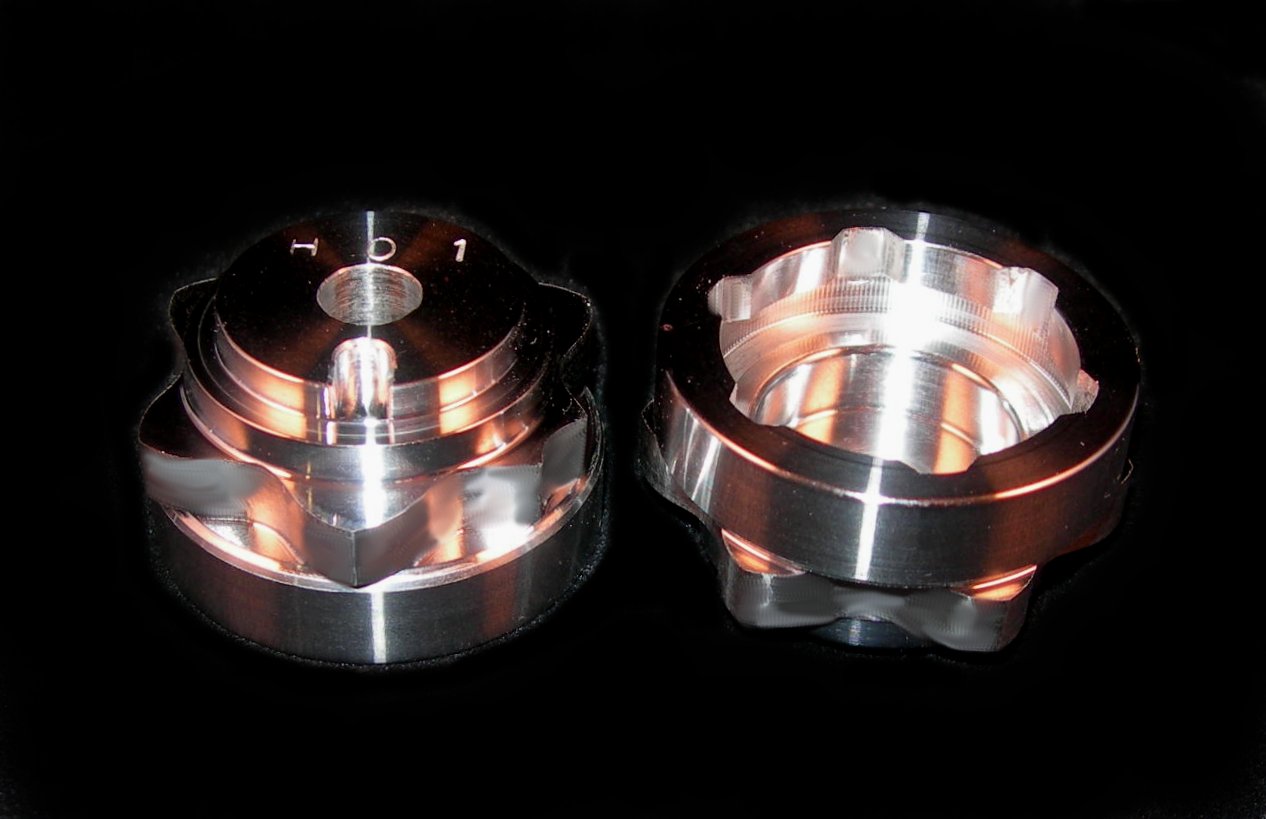
Stage 2 (do after Stage 1 arm and spring kit) EVO Shift Star The EVO Shift STAR Upgrade will upgrade your Stage 1 equipped bike to the latest, greatest shift action! Who else but Factory Pro would continue to support the classics? Making them as good as the new bikes and making the new bikes, even better! Banish the last bit of clunk from the gearshift mechanism, Make shifting MUCH quicker and virtually eliminate missed shifts. Helps address missed shifts caused by poor shift detent "star" profile. The STAR is an upgrade for the world famous Pro Shift Kit by Factory Pro. |
|
Carburetor Tuning Kits |
|
CRB-H20-1.1-TI $159.95 for the stock airbox |
Ti ProKit carb kit Titanium needles for lifetime use. Adds more low-end / midrange, if the proper main jet is selected, more top-end power. Easy to install and tune - no slide drilling. |
 CRB-H20-1.0 $149.95 for the stock airbox |
Standard drop-in carb kit Adds more low-end / midrange,
if the proper main jet is selected, more top-end power. Celmat30 needle
material. Easy to install and tune - no slide drilling.
|
 CRB-H20-3.0 $149.95 for pod filters |
Config 30 Carb Kit I'm not sure how you do it (nicely), but if you can get some filters onto the stock carbs (no, I can't help much) this kit worked pretty well.
|
| Hybrid Ceramic Wheel Bearings | |
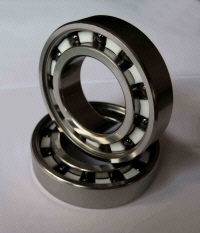 $279.95 Hybrid Ceramic intro special reg $299.95 4 bearing kit 2 front and 1 rear wheel and 1 sprocket carrier bearing set pn: BE-HYCER-H91/vfr750,90-97 |
Hybrid Ceramic Wheel Bearings 4 bearing set Tough steel races and almost friction free ceramic balls. Bearings have rubber seals that are easy to remove if desired. marc@factorypro.com |
|
Air Filter |
|
|
FI-BMC-11524S $79.95 |
Factory
Pro and BMC have produced the finest cleanable air filter for
the VFR that is available. Manufactured to European craftsman's standards,
if any filter would last 1,000,000 miles - these would! High quality injection molded filter frame features integral breather plates, like the original filter - avoiding the "need 3 hands to install this ...." assembly method of other aftermarket air filters. Actually, after seeing and using one of the BMC filters, I'm don't know why anyone would use any other aftermarket filter!
|
Install notes:
This project is a collaboration between Brandon Monnig and I. Brandon installed a Factory Shift kit in his '93 VFR and photographed his install. I volunteered to write-up this article based on my install.
First off I'll give a little background. My '93 VFR has 22K miles on it (Feb 2002). I've noticed that if I'm lazy with my shifts I occasionally catch false neutrals (this can happen between any gear). Also, the feeling of the VFR gearbox is a bit mushy. I wanted something to improve the feel and make shifting more precise. Of course this is exactly what is listed on Factory Pro's site to describe their Pro shift kit. At $80 it's a bit steep, especially considering what you get. The kit comes with a new detent arm that uses ball bearings, a stiffer detent spring, and a new transmission cover gasket. Looking at the package I couldn't believe I had just spent $80 on this but it had been on my list of improvements for ages so here we go.
Let me tell you that I wasn't adequately prepared for how long this was going to take. The only mechanical work I do on my bikes are brakes/clutch, oil, tires (means pulling the wheels), and air filters. Pulling the water pump and digging into the transmission certainly wasn't in my repertoire and I was a bit nervous but it's not as hard as it looks/sounds. Just make sure you set aside a fair amount of time (it took me 8 hours and 6 beers but that included lunch and 'help' from 10 local VFR riders who had gathered at my place to perform maintenance on their bikes. Of course, we tend to spend more time yacking than wrenching so I would set aside about 5 hours and 4 beers (depending on how hot it is)). It's also a good idea to time this work w/ an oil change at the minimum and perhaps a coolant change as well.
Ok, so first you pull the plastic (mids and lower on my '93). When you can see everything in this picture you're ready. Go ahead and drain the oil and coolant (if you're doing coolant).
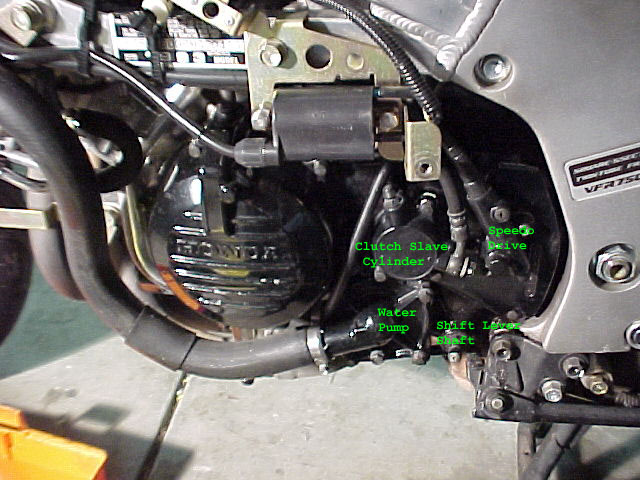
First you'll need to remove the slave cylinder and kickstand. Don't worry about the gasket on the slave cylinder. Nothing behind here is 'wet'. It's really just to keep dust/dirt out of the clutch. Below shows these 2 items removed.
Closeup of what's behind the slave cylinder.
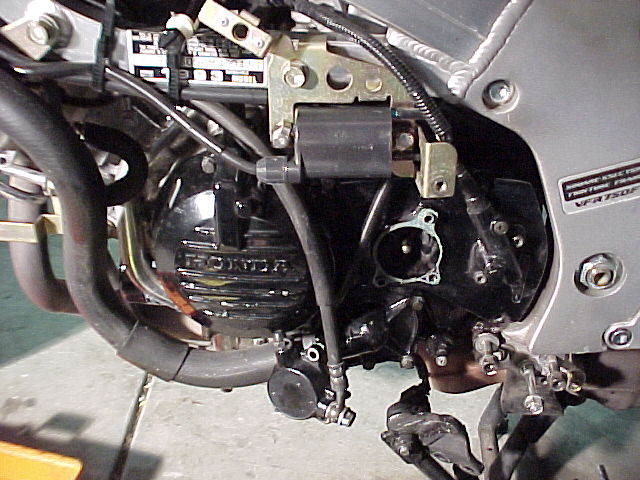
Next, remove the speedo drive and countershaft sprocket cover. That little nylon/plastic nut attached to the sprocket bolt is what occasionally strips causing a loss of your speedo. Afterwards you should see this:
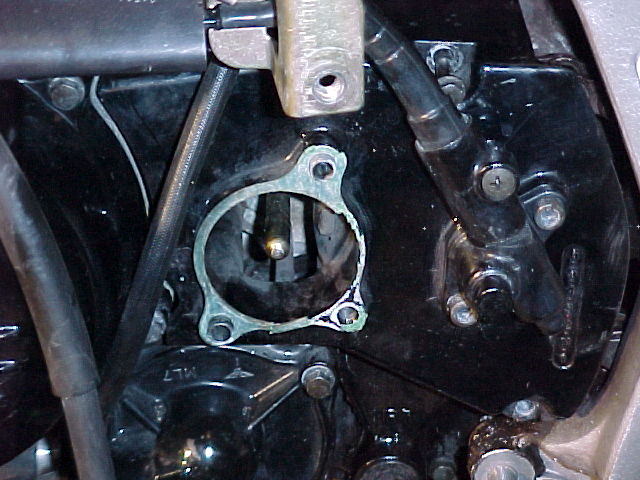
Now it's time to pull the water pump. Having it to do over again, I think you should be able to pull the whole water pump w/o splitting the 2 halves of the water pump itself. I removed the outside cover of the water pump (get ready to catch coolant splilling out), zip-tie'd it up to my fairing stay, and then removed the actual pump part (be ready to catch oil here - very little if you've drained the oil.). It took some wrangling to get the pump part out but it's only in there w/ an o-ring so just keep wiggling and it'll come out. You might be able to leave the 2 halves of the pump together and just remove the whole thing from the engine obviating the need to catch/replace coolant. Below you'll see the water pump removed. The hole w/ a bit of oil in it is where the water pump attaches to the engine.
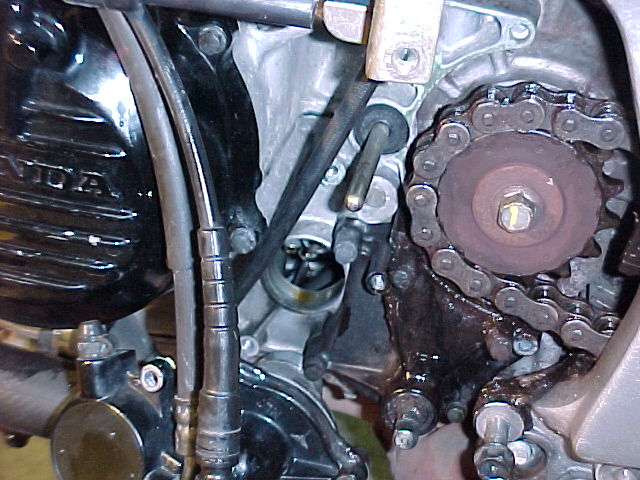
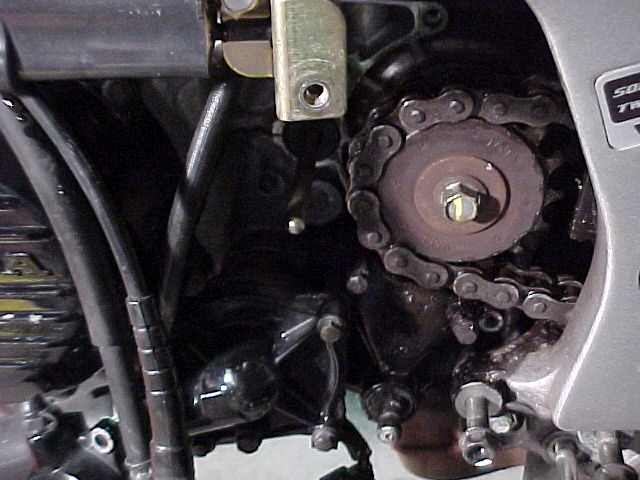
Next we need to get that front sprocket off. My suggestion is to remove the rear sprocket (you'll need a 6mm hex wrench and 14mm socket) to create slack in the chain. Put the bike in gear and break the front sprocket nut loose. Use the slack in the chain to slide the front sprocket off and get it out of the way. W/ that out of the way, you can pull the transmission cover. You'll get a little oil here and you can be sure the gasket will tear ;) This picture shows the transmission cover removed.

A close-up of the transmission
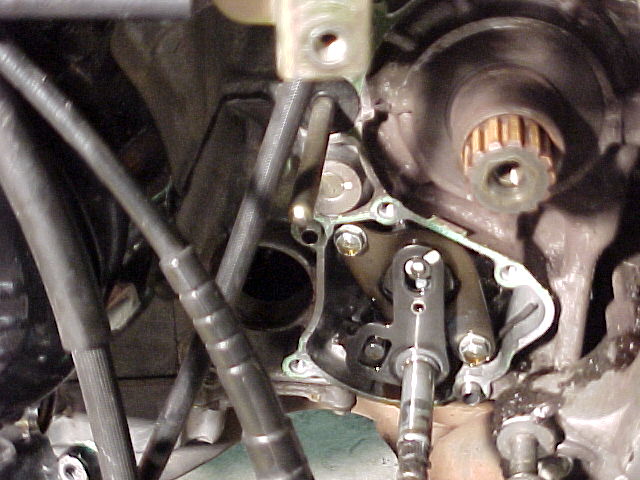
The shift lever shaft is next. Just slide it straight out and set it to the side. Don't touch the spring on there, that's not the one you're changing! Next you'll need to remove the 2 bolts and that gold-colored cover. This is what you should see:

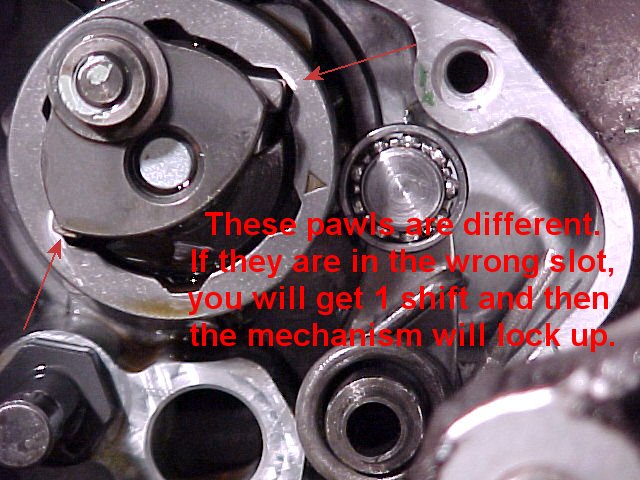
Now we're getting down to business. You'll need to remove the OEM detent arm and spring. W/ a little coercion, it should slide off its shaft. Here are the OEM and Factory detent arms and springs side by side:

The new detent arm and spring should slide right back on the same shaft. Now it's just a matter of putting everything back together! Here's a pic w/ the Factory bits installed:
Make sure everything lines up when you reinstall that gold-colored cover. I bent mine a bit when I was putting it back on because the main mechanism had slid out from the engine a 1/4" or so if it doesn't seem like it's going on easily, recheck everything. After that's back in you'll need to remove the old gasket and install the new one. On the cover I used a razor blade to get the heavy stuff and then from 400-grit sandpaper laid on the garage floor n just swirled the cover on it till it was gasket-free. The engine side wasn't so easy ;) I used the razor blade as best I could and then my dremel w/ a wire wheel on slow speed to get the rest of it.
When you're finished removing the old gasket, install the shift lever and attach the transmission cover. Despite having a new paper gasket, I still put a tiny layer of RTV on both pieces.
You're on the home stretch now. Reinstall the front sprocket and chain, water pump, sprocket cover, speedo drive and clutch slave cylinder. If you didn't replace the coolant but some came out when you were R-and-R'ing the water pump, you'll need to 'burp' the system as you introduced air into the system. Open the radiator cap and top off the coolant. Start the engine and let it warm up. Once the thermostat opens you should get some bubbles coming up. After it's warm (gauge is above the C) and you don't see any more bubbles, shut it down, reinstall the rad cap, and top off both the rad and overfill tank.
Now just do your oil/filter change, reinstall the bodywork, and you're done!
Impressions: Definitely better feel. Shifting is indeed more definite and precise. I can even shift through all the gears w/ the engine off. I've only been riding a few days but I'm happy w/ the results. Idk if I'm $80 happy but this is one of those things that you don't really notice it working. The test will be if I notice not catching any more false neutrals even w/ lazy shifting.
UPDATE: September, 2002 I've put a few thousand miles since the shift kit installation and I have to say I'm very pleased with the result. I don't 'notice' the transmission anymore. Which was the goal after all. While I think Honda should have designed the shift mechanism like this in the first place, Factory Pro is providing a useful aftermarket device.
Links
Magazine articles
|
|||||||||
|
LINKS |
|||||||||
|
Train to Win |
The Rich Oliver
Mystery School will help you discover your hidden inner strength.
It will challenge you. It will teach you a new way of thinking, and a new way of riding. You can take your riding to an exciting new level! We use a variety of proven drills and training techniques. Practicing these techniques with our Yamaha dirt track trainers will enhance your abilities both on the track or the street. It doesn't matter what you ride or race, the Rich Oliver Mystery School improves everyone's skill level and mindset! |
||||||||
|
|
Factory Pro Springr Special Book a sightseeing flight
over the Wine Country or a Kamikaze aerobatic flight or a biplane flight
over Infineon Raceway, the Golden Gate Bridge and the San Francisco
Bay for one or two during the spring and get a free souvenir t shirt! 707 938 2444 |
||||||||
|
|
The Military Vehicle
Technology Foundation was founded by the late Jacques Littlefield. It
is located in Portola Valley, just south of San Francisco.
The
Military Vehicle
Technology Foundation oversees one of the largest and most significant
collections of historical military vehicles in the world. Our goal is
to acquire, restore, and interpret the historical significance of 20th
and 21st century military vehicles. Domestic and foreign combat vehicles
such as tanks, armored cars, self-propelled artillery, and other technically
interesting mobile platforms are the focus of the collection. We also
maintain an extensive technical library that describes many vehicles
down to the part level. Aside from the vehicles, there are towed artillery,
antitank, and antiaircraft guns. Military support equipment, inert ordnance,
and accessories round out the collection. |
||||||||
| The extension of the laboratory
for engines of the Swiss Federal Institute of Technology was completed
in about 1935. Its architect was Rudolf Otto Salvisberg (1882-1940).
He had a successful career in Berlin but returned to Switzerland after
the advent of the Nazis. His architectural style was somewhat similar
to that of Erich Mendelsohn. The staircase of the laboratory is in normal
use but well preserved. Edited to the tunes of Chemical Residue by Herbie Hancock. |
|||||||||
|
|||||||||